Deutsche Version hier! / Extractor tool / Complete Infosite
Sometimes a technical investigation starts completely by accident – and end with a game engine torn apart, and discovering new cheats and eastereggs.
In my case, all I wanted to do was play Sierra’s 1996 3-D Ultra Pinball: Creep Night again on an emulated Windows 98 PC. It was one of those games I played so much as a child that, decades later, quite a surprising amount of it still seems to live in muscle memory.
While playing it again, however, I noticed something I had obviously never thought about as a child: despite its name, 3-D Ultra Pinball is not really a 3D game in the modern sense.
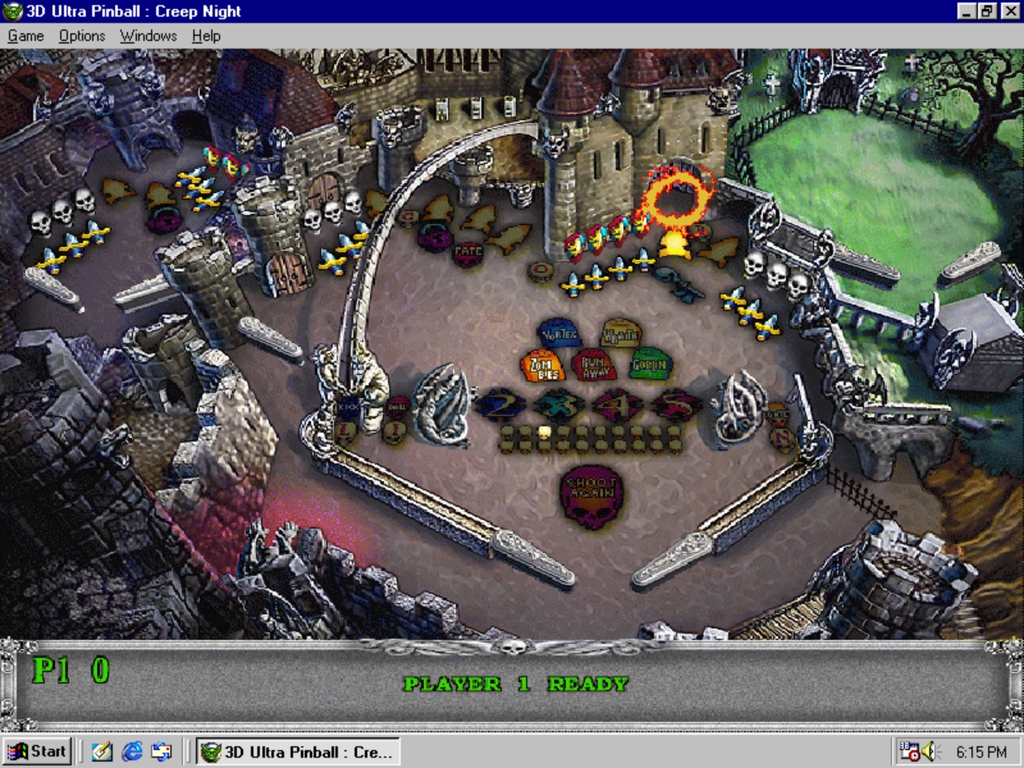
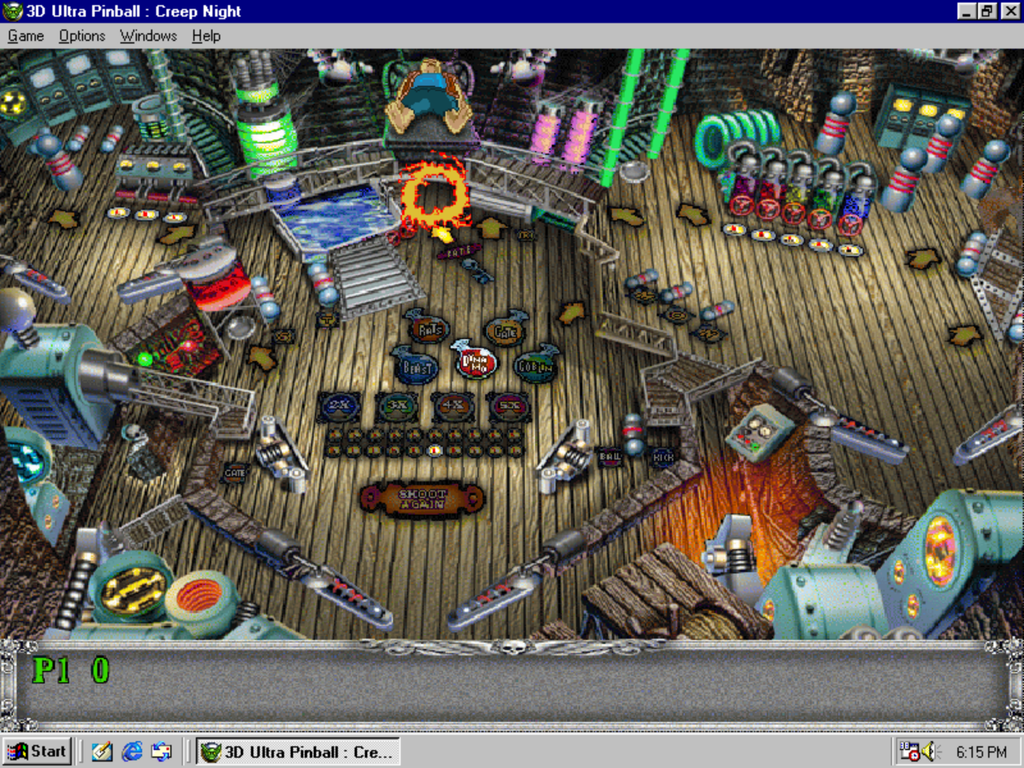
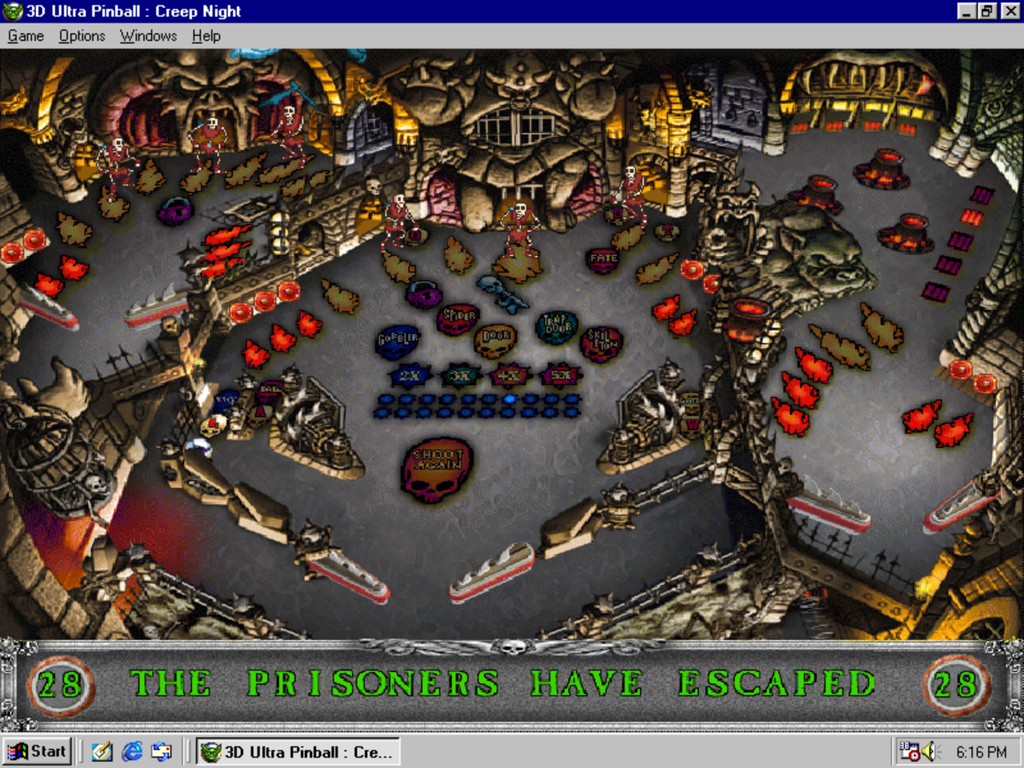
The tables look three-dimensional. So do the characters, ball, ramps and animations. But there is no polygonal 3D world being rendered in real time. Instead, the game developed by Dynamix relies heavily on pre-rendered 2D graphics.
That observation started a journey into the internals of its engine. 😊
“3-D” Without 3D
The basic idea is remarkably simple and clever from today’s perspective: The pinball tables appear to have been created using 3D tools and then rendered into finished images. In the game itself, each table has a complete 640 × 480 pixel background.
Smaller sprites for moving objects such as the ball, characters, bumpers and animations are drawn on top of that background.
In simplified form, the rendering process therefore looks something like this:
Pre-rendered 640×480 background
                +
          animated sprites
                +
              ball
                +
       flippers / targets / effects
                =
          final game image
The “3-D” therefore primarily describes the visual production of the assets. At runtime, the game itself operates largely with 2D graphics.
For a Windows PC in 1996 this was a very sensible solution. The expensive 3D work could be done in advance, while the player’s computer only had to draw prepared pixel graphics.
Looking Inside RESOURCE.001
The game’s CD contains, among other files, the following pair:
RESOURCE.MAP
RESOURCE.001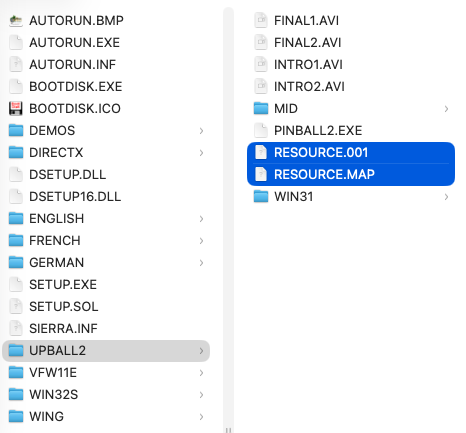
RESOURCE.MAP acts as an index, while RESOURCE.001 contains the actual data.
In my copy of the game, the archive contains 854 individual resources:
430 × WAV
275 × BMP
109 × ANM
 19 × ITF
  7 × PAL
  4 × TBL
  4 × TBM
  4 × RES
  2 × PFT
The file extensions are somewhat misleading. A resource named GHOST0.BMP, for example, is not a standard Windows BMP file. Instead, its contents start with a proprietary Dynamix header BMP:. Similar internal formats exist for animations (ANM:) and other resources.
The resources themselves are stored sequentially inside RESOURCE.001. RESOURCE.MAP contains a hash and offset for each entry. At that offset in the data file, a DOS-compatible filename is followed by the resource size and finally its data.
What Does the “Large” Installation Actually Do?
This also answered a small question raised by the original installer.
Creep Night offers a “Large” installation option. When selected, the file ENGLISH\LARGE\OVERRIDE.DAT is copied to the hard drive. The installer explains that afterwards essentially only audio will still be streamed from the CD.
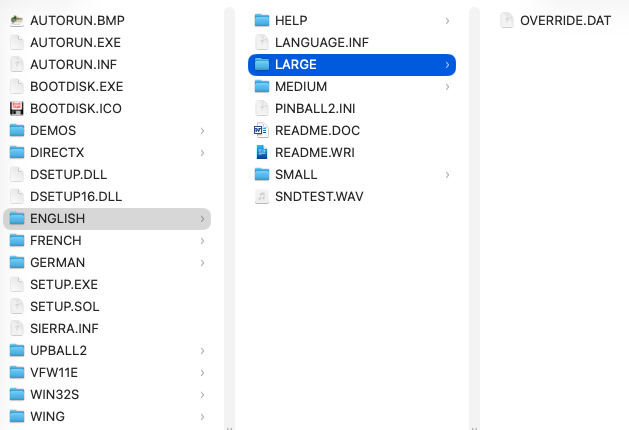
OVERRIDE.DAT contains both an index and resource data, effectively making it a self-contained local version of the RESOURCE.MAP/RESOURCE.001 system.
While RESOURCE.001 contains 854 resources, OVERRIDE.DAT contains 817. The 37 missing files are:
SX_4000.WAV
...
SX_4036.WAV
and all of them are indeed long audio files. Together, they account for roughly 34 minutes of audio and around 90 MB of data.
This gives a surprisingly precise explanation of what a “Large Installation” meant in 1996: almost all graphics, animations and short sound effects were copied to the faster hard drive, while the large audio tracks remained on the CD to save disk space.
GHOST0.BMP: Four Ghosts in Two Kilobytes
One particularly interesting resource is GHOST0.BMP. It is only around 2 KB in size, yet it contains not one but four separate sprite frames:
Frame 1: 56 × 38 pixels
Frame 2: 56 × 64 pixels
Frame 3: 64 × 62 pixels
Frame 4: 64 × 51 pixels
Each frame has a small header containing its width, height, an encoding byte, compressed size and uncompressed size.
The first frame, for example, begins effectively as follows:
38 00          Width:  56
26 00          Height: 38
83             Encoding: 0x83
61 01 00 00    Compressed block: 353 bytes
50 08 00 00    Uncompressed: 2128 bytes
And this reveals something important:
56 × 38 = 2128
After decompression, there is exactly one byte for every pixel. The graphics are classic 8-bit paletted images.
What Does 0x83 Mean?
This encoding value initially became the central mystery. For this encoding, there is no documentation. Only a few fragments of other people on the internet that tried to reverse engineer the proprietary Dynamix compression. However, by examining the original PINBALL2.EXE, it was possible to locate the relevant code path.
The original program reads the encoding byte and effectively performs:
encoding = encoding & 0x7FSo 0x83 becomes 0x03. Execution then branches to the decoder for compression type 3. That decoder could be reconstructed from the original x86 code.
The Dynamix Type-3 Codec
The algorithm is a compact form of LZ-style compression. The stream first contains the number of following tokens. A block of flag bits follows, followed by the actual token data.
Each token can represent one of two things:
Flag = 0
→ the next byte is a literal pixel value

Flag = 1
→ copy pixels that have already been decompressed
A back-reference uses two bytes, or 16 bits.
Conceptually, the value is divided like this:
DDDDDDDD DDLLLLLLThe lower six bits encode the length:
length = value + 3The upper ten bits encode the distance:
distance = value + 1The stream can therefore express something conceptually similar to:
“Go back 56 pixels and copy
the following 42 pixels again.”
This is extremely efficient for sprites containing large repeated or empty areas.
The first ghost frame requires 2,128 bytes uncompressed, while its compressed stream needs only around 350 bytes.
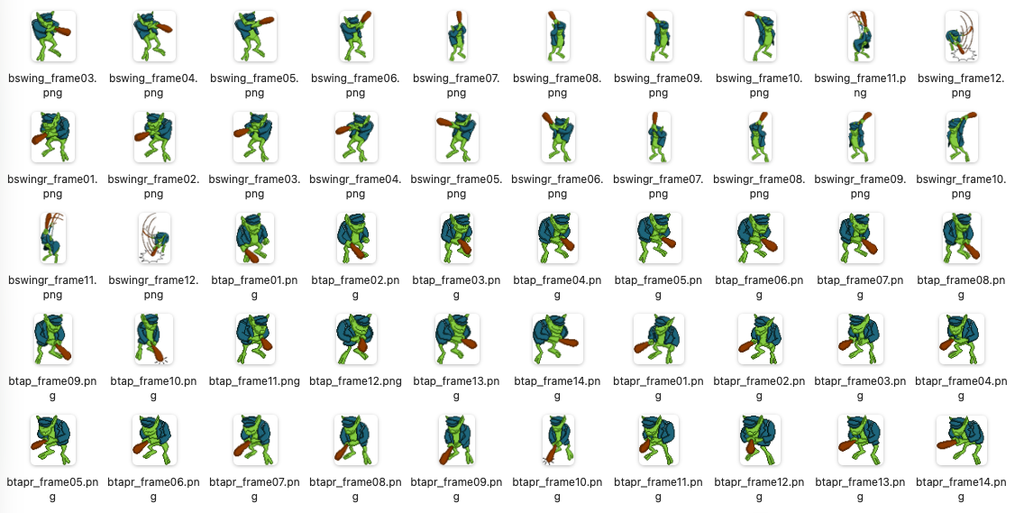
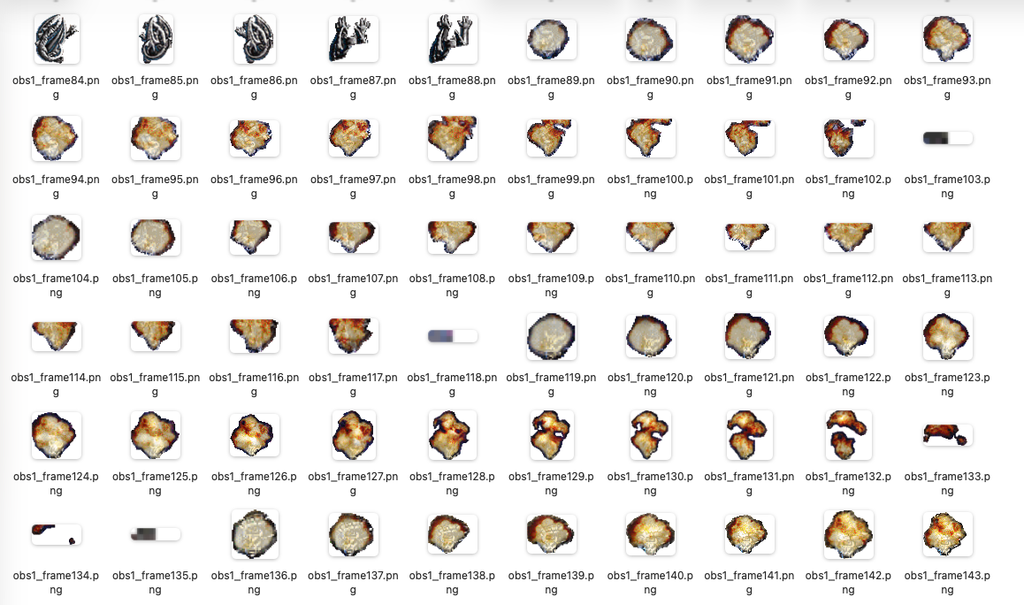
Using this compression, all animations, overlays, buttons, etc. are stored in the RESOURCE.001 file, one after the other as a constant stream. If extracted correctly, you can get all the game’s sprites and graphics – and potentially make your own flip book out of it.
How Does Transparency Work?
This is particularly charming from a modern perspective, since the developers only had the tools to work with that existed back then. Modern graphics normally use alpha channels. A pixel can be 25, 50 or 80 percent transparent and is blended with whatever is behind it.
The developers of Creep Night had no such luxury.
After decompression, each sprite consists entirely of 8-bit palette indices. The first frame of GHOST0.BMP contains 2,128 pixels – 1,425 of which have the value 0.
Conceptually, much of the sprite therefore looks like:
0 0 0 0 0 0 0
0 0 0 X X 0 0
0 0 X X X X 0
0 X X X X X X
0 0 X X X X 0
0 0 0 X X 0 0
All available evidence strongly suggests that palette index 0 is used as a color key:
Pixel = 0
→ leave the existing background unchanged

Pixel != 0
→ draw the sprite pixel
This is not alpha transparency. A pixel is either fully visible or not drawn at all.
The image data strongly supports this interpretation, although the exact blitting routine would still need to be traced instruction by instruction for absolute confirmation. (Feel free to do so!)
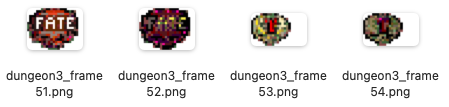
GHOST0, GHOST1 and GHOST2
Three particularly interesting resources appear next to each other:
GHOST0.BMP
GHOST1.BMP
GHOST2.BMP
They contain:
GHOST0:  4 frames
GHOST1:  9 frames
GHOST2: 12 frames
Together, that is 25 individual images of the ghost animations.
Once exported, they demonstrate very nicely what the term “3-D Ultra” really means: the characters clearly have the appearance of pre-rendered 3D models, while the game itself treats them as small 2D sprites using paletted colour and color-key transparency.
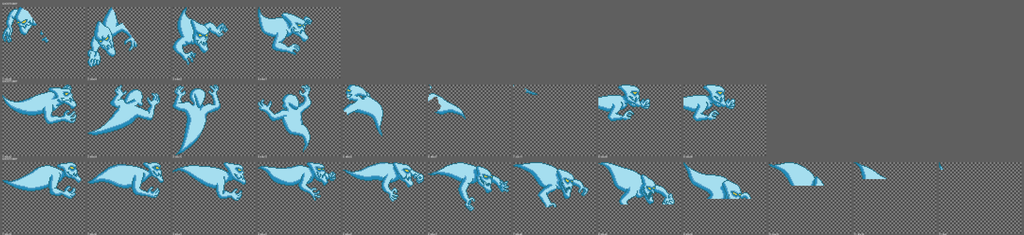
That is not a shortcoming. It is a wonderful example of how cleverly developers in the mid-1990s worked within the limitations of contemporary hardware.
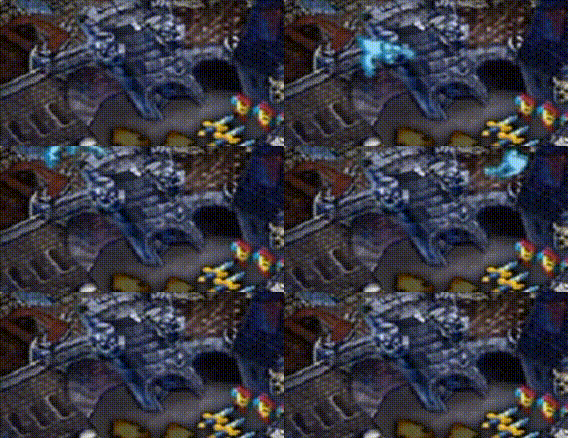
By the way, that dude is the ghost circling the towers from „The Castle“ table. 😉
The Strange “Wobble” — Simulating Depth in 2D
This visual oddity was actually what started the entire investigation: At certain positions, especially on a modern display, something strange happens when the ball passes behind a foreground object. The edge of that object appears to change slightly – almost as if a small piece of the background had been placed over the existing background without matching it perfectly.
Comparing two screenshots from consecutive game states makes the effect much easier to see:
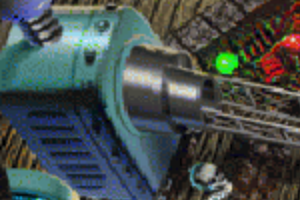
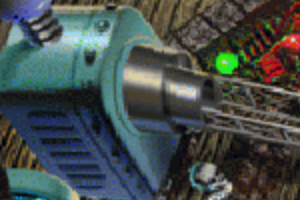
Screenshot 1: The ball is elsewhere. All good.
Screenshot 2: The ball is behind the foreground object. At the same time, a subtle seam or change in the object’s pixels becomes visible. In these screenshots most noticeable when switching between the two, or if seen in motion in the game.
The interesting part is that the pixels changing between the screenshots cover a much larger area than the ball itself. The affected region resembles a rectangular section of the foreground object.
This suggests another very effective 2D technique: an occlusion sprite or foreground layer.
The engine could render the table and ball first, then redraw a prepared section of the foreground whenever the ball is supposed to appear behind it:
Table background
      ↓
Draw ball
      ↓
Is the ball behind an object?
      ↓
Draw foreground / occlusion sprite
over the ball
This provides convincing depth for pipes, ramps and other table components without requiring any real 3D geometry or a Z-buffer.
The visible “wobble” may therefore come from the overlay itself. A slightly different dithering pattern, palette representation or even a one-pixel alignment difference between the overlay and the original background would be enough to create the subtle seam visible on a modern LCD.
Same is true if we look at our ghost GIF from above: Pay attention to the stone structure of the tower. As soon as the ghost sprite enters the screen, the pixels of the background shift slightly. It seems that the logic for palette index 0 (i.e. draw the background again here) is not perfect:
On a typical 1990s CRT, analog video, the shadow mask or aperture grille and the general characteristics of the display would blur these differences much more naturally.
A modern display, meanwhile, reproduces every emulated 640×480 pixel with brutal precision.
Lost and Found: Resource File
I just love going through such internal files. The developers never anticipated anyone else looking at them, so you sometimes find exciting stuff that was never taken out or meant as eastereggs. (Greetings to The Cutting Room Floor!)
Here are some exciting things to see:

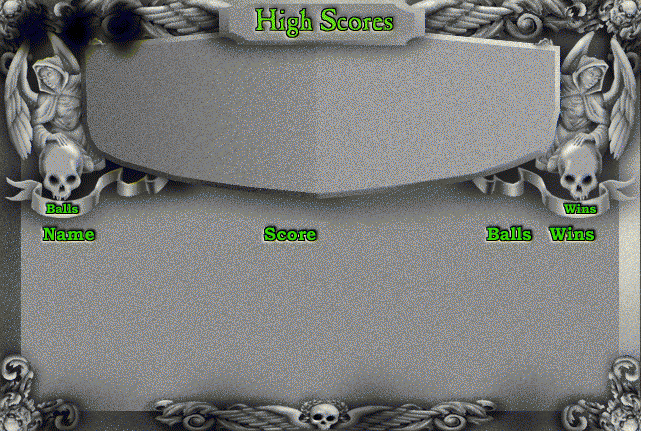



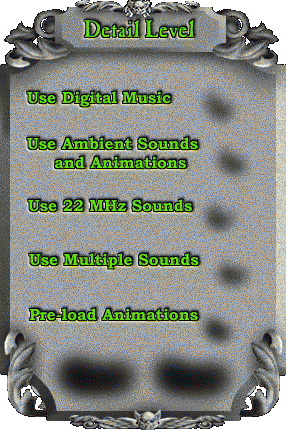
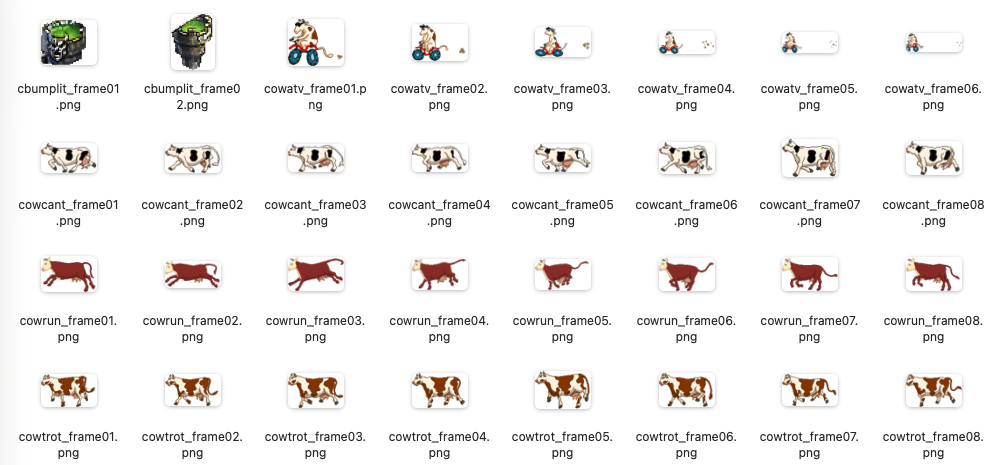
I really need to investigate more about the cow easteregg. Cows are a strange, but well-loved easteregg tradition in physical pinball machines, so it would be a nice callback by the game. I’d also say that the designers were absolutely aware of physical pinball, because in the Help documents, there is a dedicated chapter with recommended reading about the history and principles of physical pinball, with works e.g. by Roger Sharpe – a very nice tip of the hat to pinball machines!
Well…. let’s do this right now! 😊
New Cheats and Easter Eggs
These are as of today completely undocumented cheats and easter eggs. I am a little proud, to be honest.
If you open up the highscore table, you can enter „data“. Just type it into the void with your keyboard. You will hear a voice saying „Excellent!“. That means, cheat or debug mode is now enabled (the variable DYNAMIX is set to 1).
Now for the fun part:
If you enter „cows“ during the game, you will hear a moo sound. This confirms that the flag cow_mode is now set to true. If you start the Shooting Gallery bonus game, all sprites are replaced with cows – some trotting, some running and even one cow riding an ATV. To start the bonus game, you will have to complete all modes in „The Castle“ and then shoot the portal.
Another useful developer code to help you with this is „fin“. If you enter this one during the game, all modes are marked as done and you can move on to the final boss phase of each table. It’s most likely a shortcut for developers during testing (I guess?). This code only works, if „All Tables“ is selected as game mode. If you start a game with only one table, nothing happens.
Also, there is another state called mcow with corresponding animation:

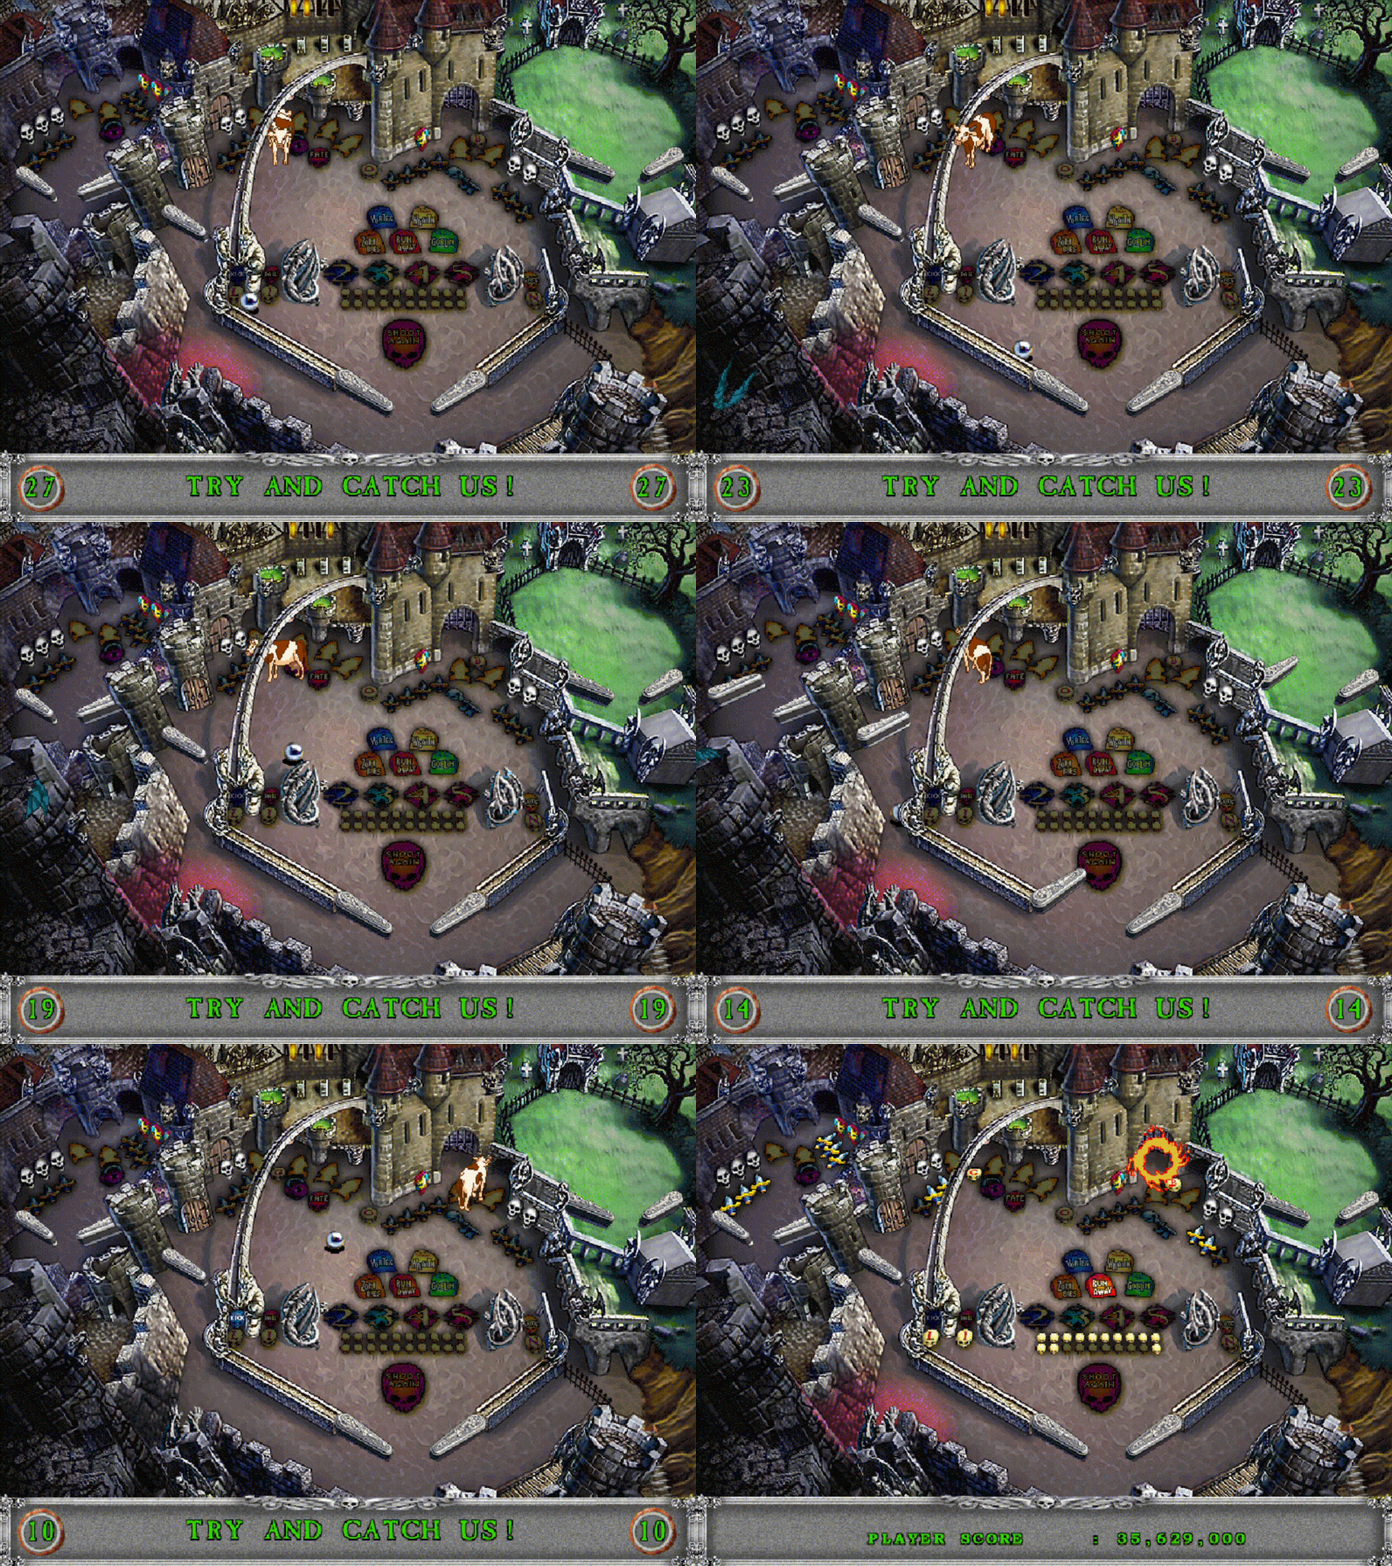
Unfortunately, I could not yet find out how to trigger this easter egg. From the code it’s clear that the cow would replace the goblins in their mode on all three tables. Instead of hunting down goblins on their seven random positions with the silver ball, one would shoot for a cow that circles on the playfield instead. It seems that the needed trigger was, however, never included in the game. Bummer.
However, I wrote a little patch tool that basically applies the flag cow_mode also to this easter egg. You can download it here, patch your PINBALL2.EXE with it and try for yourself (type „DATA“ in Highscores screen, then type „COWS“ in active game). See the README.MD in the ZIP file for more info.
And that is how it looks like – pretty cool in my opinion! 😊
There is another little undocumented extra: The boss key „U“. If this key is pressed during gameplay, the game window is minimized and the title of the window changed to „New Text Document“ (and thus displayed as such in the task bar).

Boss keys like these were quite popular in the 90s, when games would often be played on workplace computers.
Creep Night Resource Tool
This investigation resulted in a small Python utility capable of reading the resource archives and decoding the proprietary Dynamix bitmap resources.
Among other things, it can:
- read
RESOURCE.MAPandRESOURCE.001 - read
OVERRIDE.DAT - list contained resources
- extract raw resources
- inspect internal
BMP:containers - decode the
0x83/ Type-3 compression - read the game’s RIFF palette resources
- export individual sprite frames as standard PNG files
The tool itself consists only of Python code and contains no original game data. Also, disclaimer: Some parts of the tool were written with ChatGPT.
Requirements
Only Python 3 is required.
To inspect your own copy of the game, you will at minimum need:
RESOURCE.MAP
RESOURCE.001
Both can be found on the original game CD (in folder UPBALL2).
The easiest setup is to place them in the same directory as creepnight_tool.py.
Listing Resources
For example, to find the ghost resources:
python3 creepnight_tool.py list RESOURCE.MAP --pattern 'GHOST*.BMP'Extracting Raw Resources
To extract the complete resource archive:
python3 creepnight_tool.py extract RESOURCE.MAP -o extractedThe tool automatically looks for RESOURCE.001 next to RESOURCE.MAP.
If the data file is located elsewhere, it can be specified explicitly:
python3 creepnight_tool.py extract RESOURCE.MAP \
  --data /path/to/RESOURCE.001 \
  -o extracted
Decoding a Sprite Resource to PNG
The four frames contained in GHOST0.BMP can be exported with:
python3 creepnight_tool.py decode RESOURCE.MAP GHOST0.BMP \
  --palette CASTLE.PAL \
  -o decoded
By default, palette index 0 is exported as transparent.
Decoding Multiple Resources
All three ghost resources can be decoded in one operation:
python3 creepnight_tool.py decode-all RESOURCE.MAP \
  --palette CASTLE.PAL \
  --pattern 'GHOST*.BMP' \
  -o ghosts
Other tables can use their corresponding palettes, such as TOWER.PAL or DUNGEON.PAL.
If you want to export all graphics, just omit --pattern.
Exporting Full Backgrounds
For complete table backgrounds, palette index 0 usually should not be made transparent.
Use:
python3 creepnight_tool.py decode RESOURCE.MAP CASTLE.BMP \
  --palette CASTLE.PAL \
  --transparent-index none \
  -o backgrounds
Inspecting OVERRIDE.DAT
The archive used by the Large installation can also be processed directly:
python3 creepnight_tool.py list OVERRIDE.DATor:
python3 creepnight_tool.py extract OVERRIDE.DAT -o override-extractedOn Windows, depending on the Python installation, python may be used instead of python3.
Preservation and Copyright
The tool contains no graphics, sounds, executables or other original game data.
This is intentional.
Even though older games are frequently described as “abandonware”, that does not automatically mean their copyrighted contents may be freely redistributed.
The utility is therefore intended to allow users to investigate the resources from their own copy or installation of the game.
More Than Nostalgia
Originally, all I wanted to do was run an old pinball game under Windows 98.
Instead, that led to an analysis of the Dynamix resource format, the reconstruction of a proprietary image compression scheme and a small independent decoder for graphics stored in a format that is barely documented today.
RESOURCE.001 contains 275 BMP: resources with a total of 6,833 individual frames. The reconstructed decoder successfully expands all of them to exactly the uncompressed size specified by their individual headers.
That, to me, is an interesting aspect of video game preservation:
In the long term, simply preserving a CD or ISO may not always be enough. When proprietary engines, file formats and development tools disappear, knowledge of how those games were constructed disappears with them. Documenting a format and preserving an independent decoder for it is another small part of preserving the game itself.
Preserving original media is important, but preserving knowledge about proprietary file formats and engines can be just as valuable. What use is it to preserve and maintain an antique car, if nobody knows how the engine works?
And, as a bonus, it is fascinating to discover exactly which tricks a 1996 game used to create something marketed as “3-D Ultra”. Even when, underneath it all, it’s only a ton of two-dimensional pixels.
By the way: There were other titles in the „3-D Ultra“ series, especially worth of note:
- „3-D Ultra Pinball“ (the original, so to say)
- „3-D Ultra Pinball: Creep Night“ (this one was no. 2, it seems)
- „3-D Ultra Pinball: Lost Continent“ (the third one)
- „3-D Ultra Pinball: Thrillride“ (fourth and final one)
Except for „Thrillride“, they all seem to use the same engine. Maybe one could use this tool to untangle the other RESOURCE-files? Hm…

I decided to put all this info and downloads, and then some, on a dedicated Infosite (as I have done previously with The Residents‘ „Bad Day on the Midway“).
You can find it here:
https://wegneronline.com/creepnight/